Double Twining
I have a fun tutorial for us today, Double Twining! This is a little bit of a shortcut to the typical twining rows as it creates two rows of twining at once. Twining is how I start and end all my projects and it also helps even out your rows if they get uneven. I have a Youtube video explaining this technique as well if you’d like to see me do it. Don’t forget to sign up for my newsletter!

Step 1: Choose one or two colors of yarn and decide how many rows of double twining you’d like. You need 3 warps lengths worth of yarn for each row. For example, for 4 rows of twining you need 12 warp lengths.

Step 2: Find the ends and fold the yarn in half to find the middle. Create a Lark’s Head knot on the first warp string.


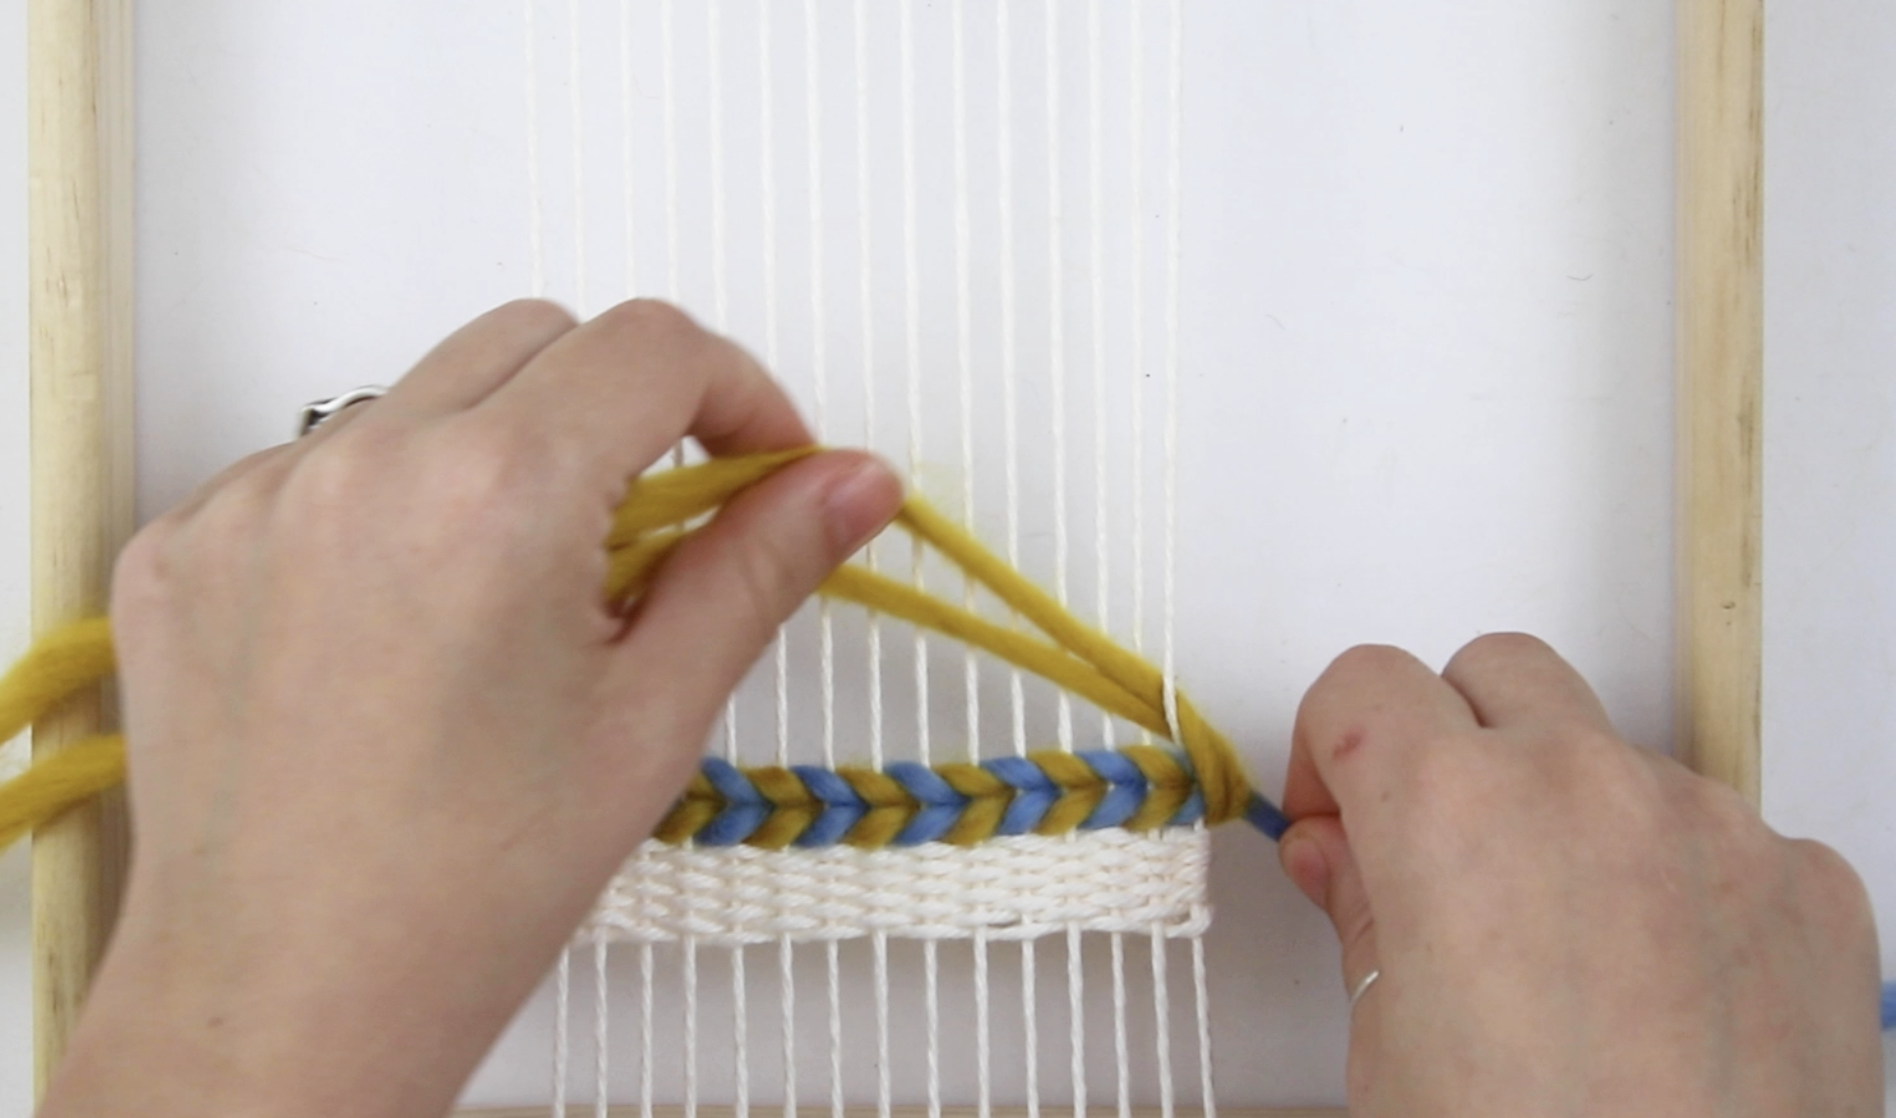
Step 3: Separate the yarn by color and weave the first color under the first warp string. Take the second color and weave it under the second warp string, in between the other pieces of yarn. Continue this pattern until you reach the end of the row.


Step 4: Comb down the row. To transition to the next row, take the weft strings that went under the last warp stings and hook the weft by taking them over the second color and going under the first warp sting on the new row.
Step 5: Continue this process until you have completed all your rows! Now you have a nice pattern of double twining.

I hope you enjoy this tutorial and find it useful in your weaving!