Weaving a Double Layer Framed Tapestry
Today I am going to share the steps to create this amazing project. I’ve been sharing this project on my Instagram for bit and have loved getting your input and ideas! You might be a fiber artist, but don’t let the woodworking part of this project scare you off. It’s super simple!

Let’s get started!
Materials:
Clear beading monofilament
Two pieces of 36”x2”x1” board
Any yarn you like
Wood glue
Drill
Step 1: I started by getting two pieces of 36”x2”x1” board from Home Depot and cutting them at the 20” point with just my simple hand saw. Then I played around to see how I wanted to connect the edges. By overlapping them in different ways it slightly changed the shape to be skinnier.

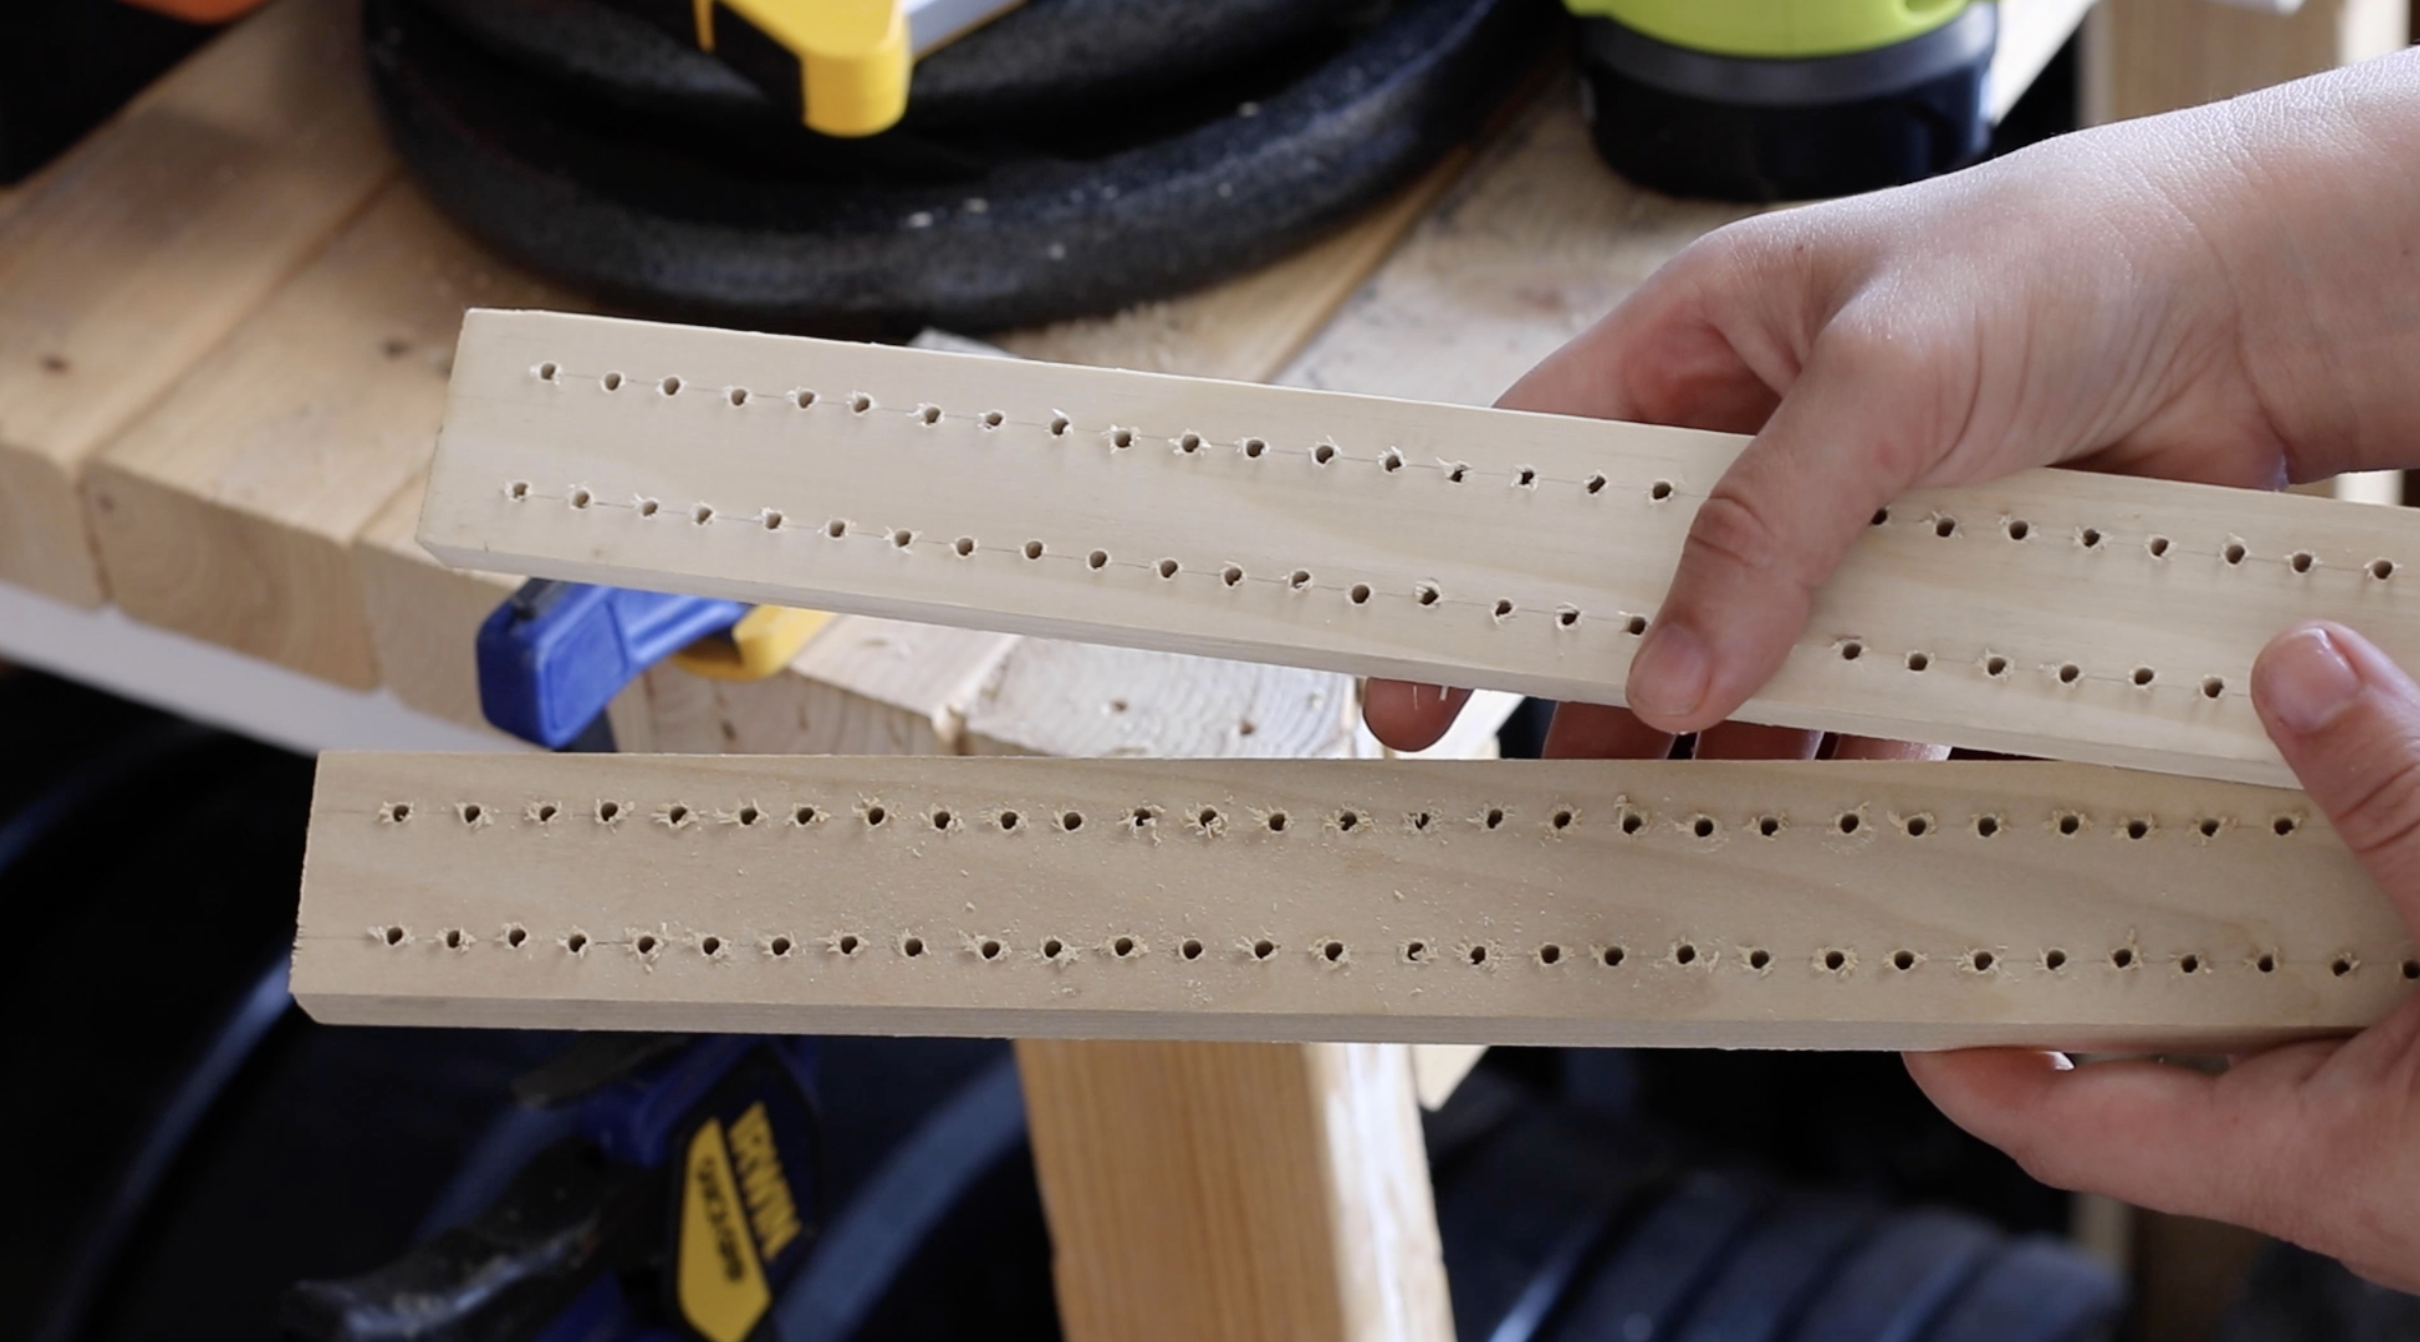
Step 2:Then I drew two lines on the top and bottom and marked dots 1cm apart. Using a ¼” drill size, I drilled holes on each dot. I then sanded down the pieces. I put wood glue on the corners and placed the frame together, using clamps to hold it in place as it dried. I probably could have called it good at this point, but because this frame was a little bigger, I decided to add nails on the edges. My husband actually came out to show me how quickly he could do this with his air compressor, but you can also hammer them in with a regular hammer.

Step 3: I used some tracing paper to test designs. This let me practice layering the two designs on top of each other to see how they worked together. There are so many ways you can go with this design, but I decided to do a geometric pattern with colors on the background and simple black stars on the front.

Step 4: I double warped the frame with clear beading monofilament, so that two strands of warp went into each hole because I wanted to be able to weave details in my shapes. I think the monofilament did a pretty good job of fading away!

Step 5: I started with a few shapes to see how the two layers worked together. Turns out, weaving on two layers of invisible warp is kind of difficult, so I slipped a piece of black paper in between the layers to make the warp strings stand out more and it made it a lot easer to see while I was weaving!

Step 6: I would weave part of the back layer and then turn the frame around and weave part of the front layer. The monofilament was also helpful because it was slippery, so I could easily move the shapes around to get them centered, but they didn’t move unless I needed them to.

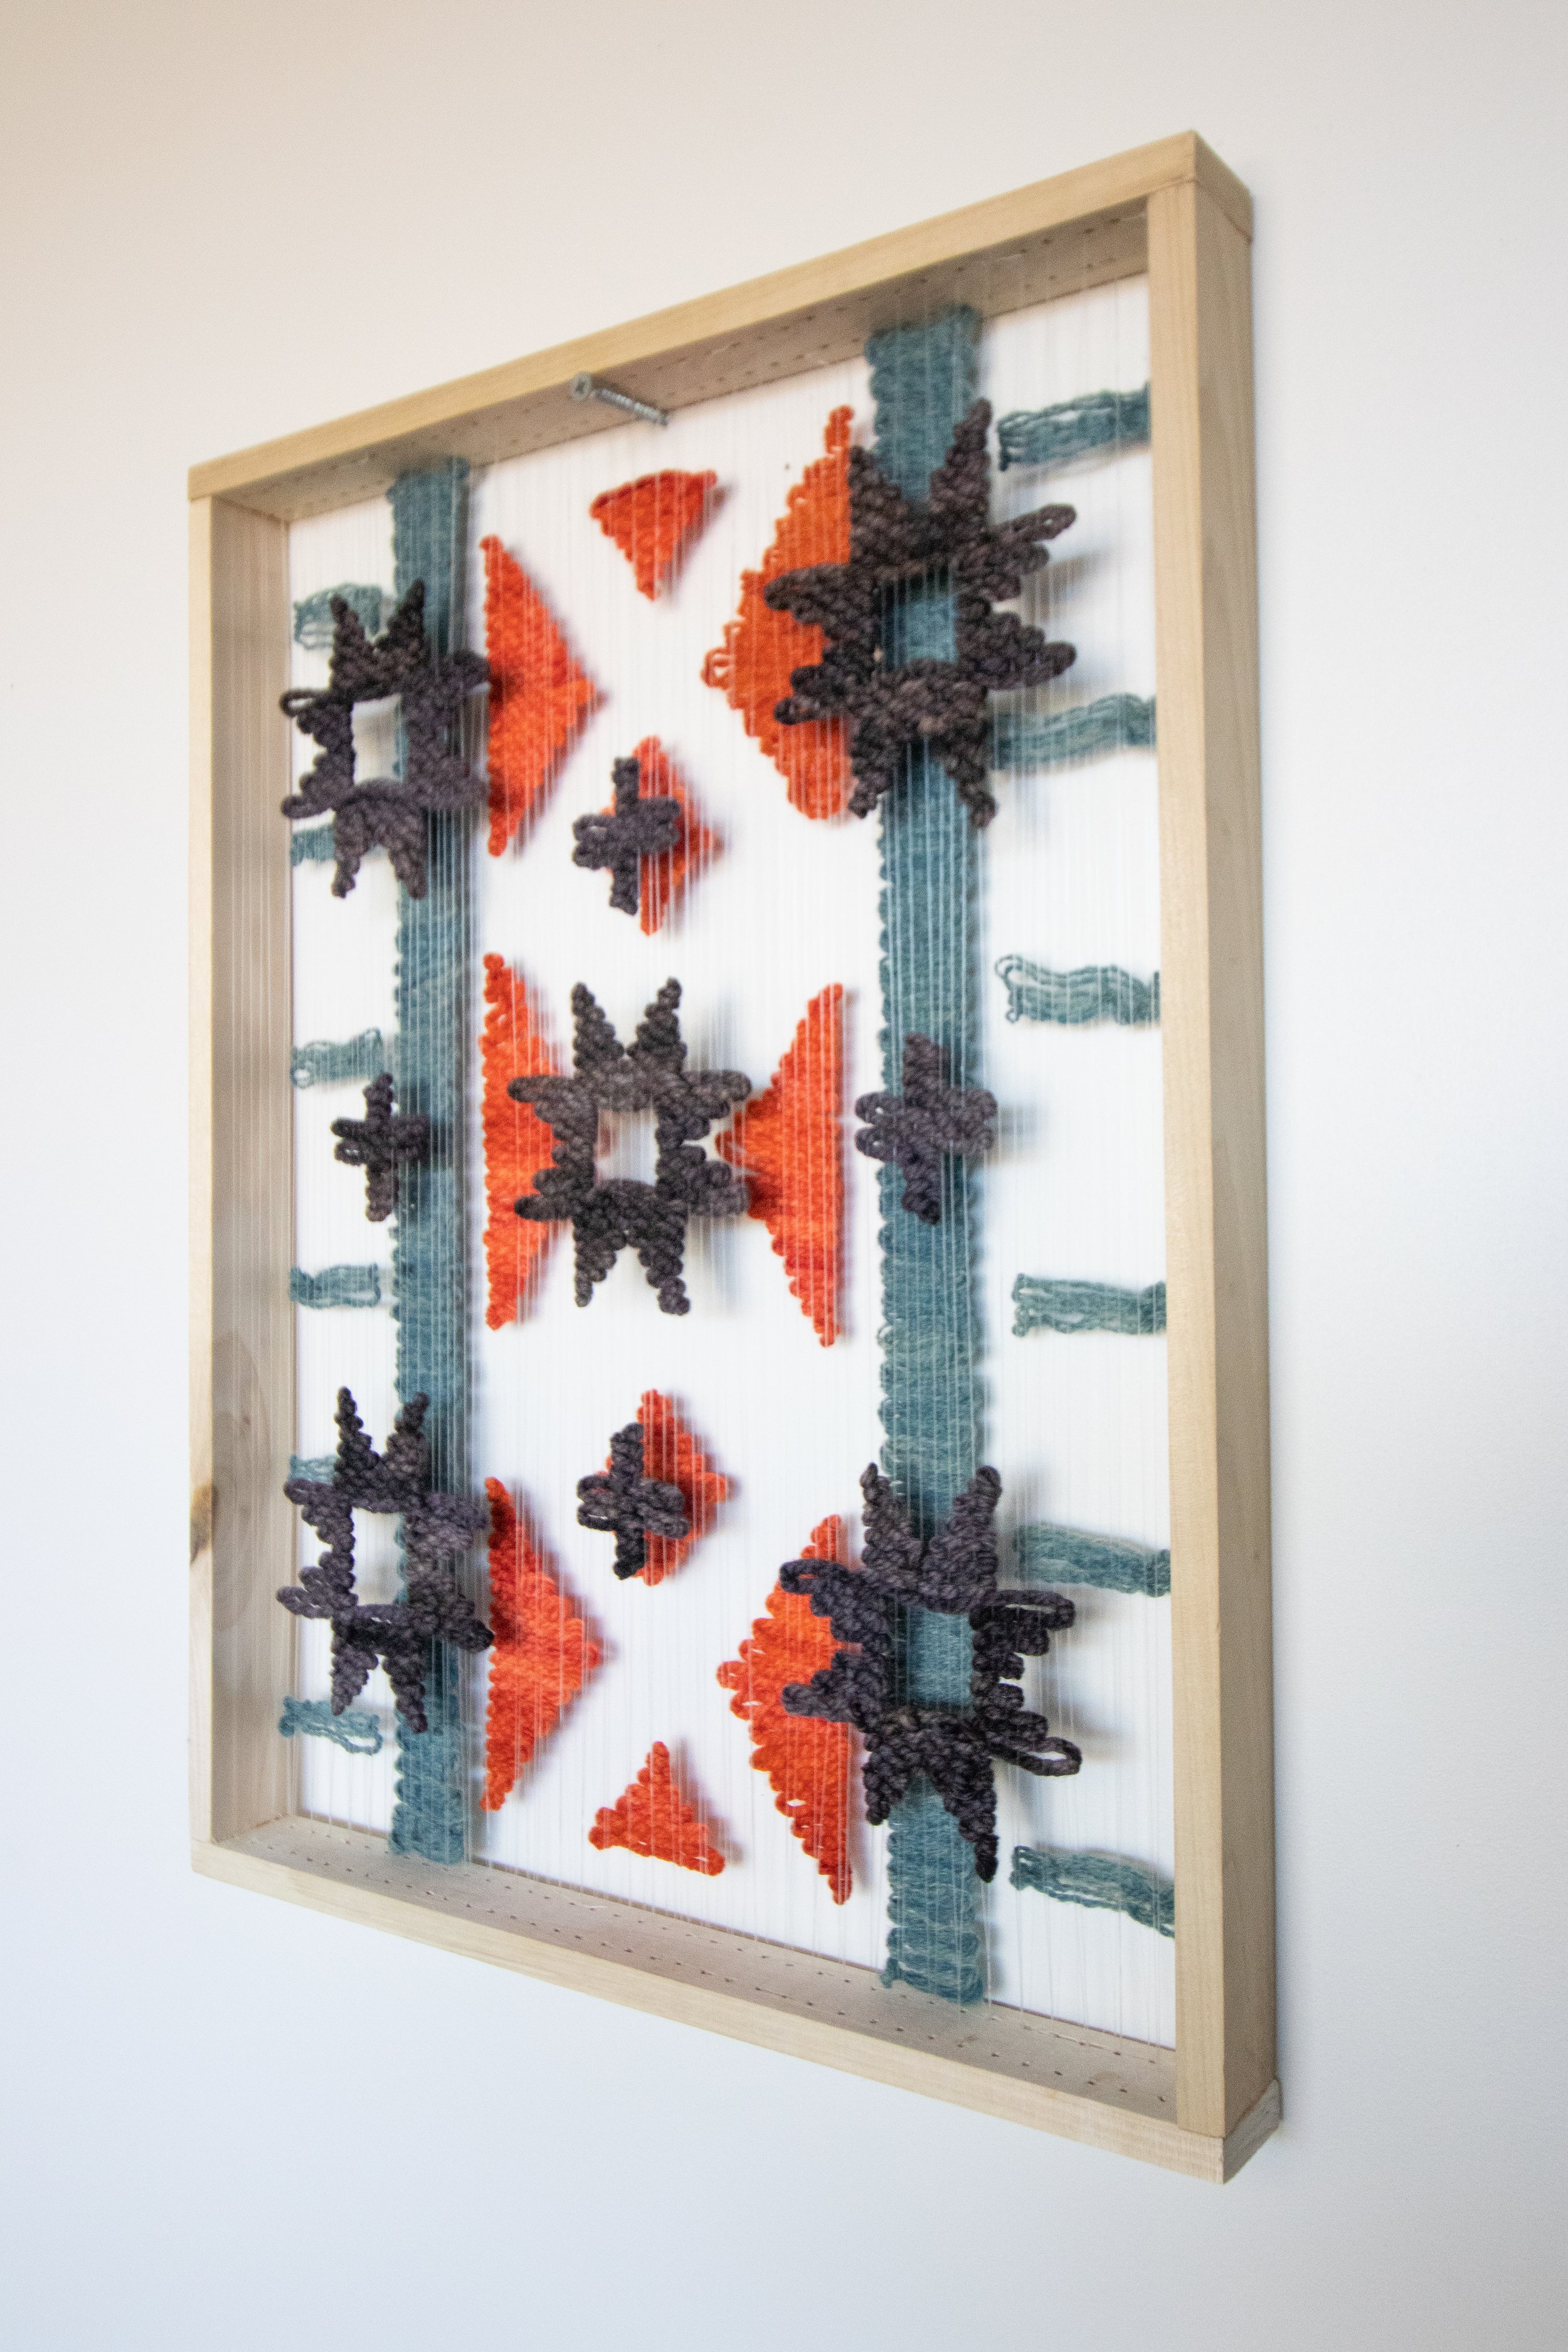
And here’s the finished project! I think this idea is so cool and I’m excited to explore it more. I love the way the composition changes depending on what angle you are looking at it, so the layers appear to move as you walk by. I think the designs on my two layers were maybe a little too busy to work well together, so I want to try this again with simpler shapes and maybe try a monochromatic piece by using only one color on both layers. We will see!

Check out the youtube video here to watch me make the project!
If you try this project, please tag me on Instagram and let me see! I think there’s a lot of potential and I can’t wait to see what you do. I hope you enjoyed following along with my journey. Find me on Instagram or on my website, hellohydrangea.com, where I have dozens of weaving classes, kits and looms.