Crosses Pattern Tutorial
Hello weavers! I have a simple pattern tutorial that you can learn and use TODAY. You are going to love the look and how easy it is to pick up. Let’s get started on the Crosses Pattern!

Materials:
All you need is your loom and two colors of yarn that are the same thickness.
Step 1: Start by making sure your weft is a balanced thickness to work with your warp. Do this by gently tugging on it to mimic the tension of it being woven, and hold it between two warp strings. If it fills the space without covering them, you will have a balanced weave.

Step 2: This pattern is also really easy because it is just tabby with two colors. Weave two rows with a different color than the warp, I am using a natural rope.

Step 3: Then weave one row with the same color as the warp, I am using a yellow felted yarn.
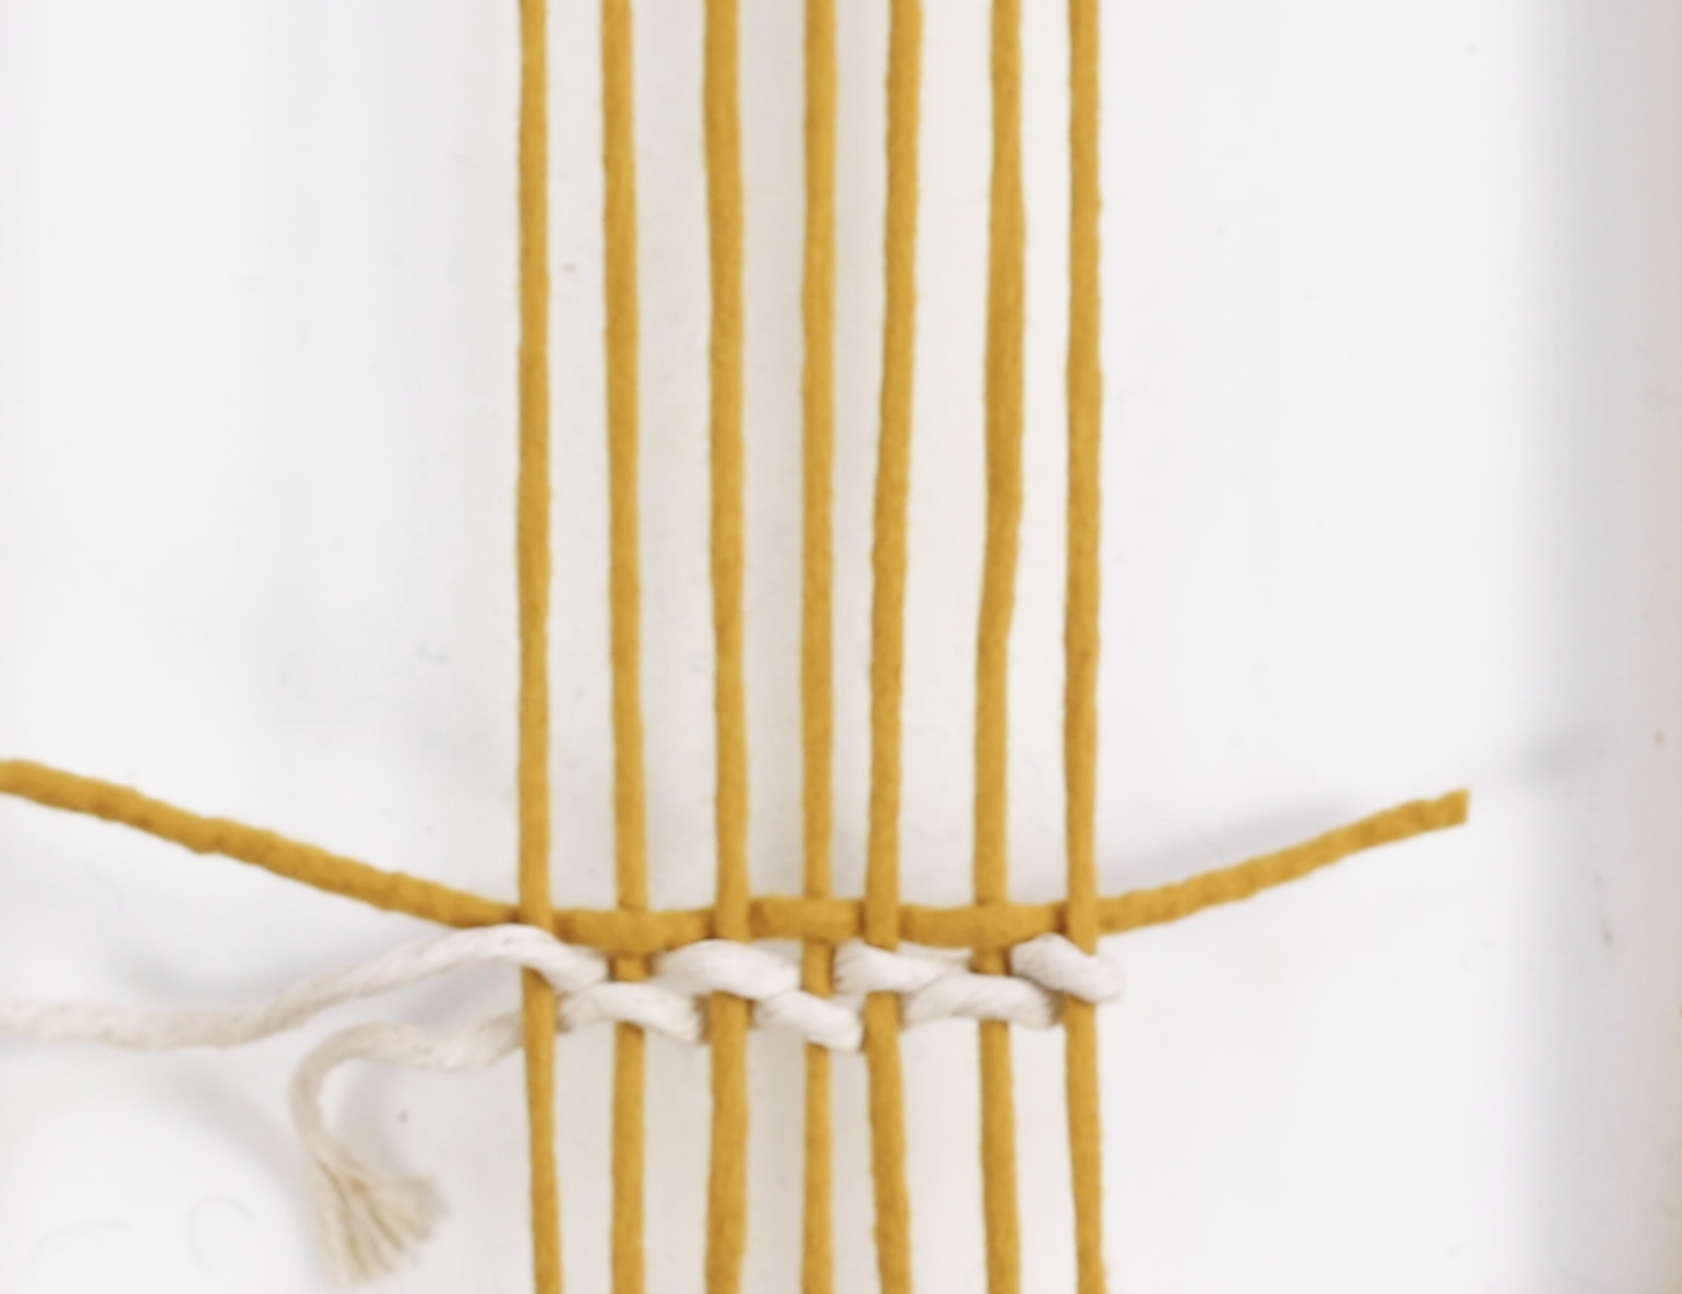
Step 4: Then just continue to alternate between weaving two rows with the natural color and one row with the yellow until you have finished the area. When you are done, feel free to adjust the rows so that the crosses show up more. You can use this pattern at any point of your weaving project.

Aren’t the crosses such a pretty design element? So simple, too! If you want to watch me weave this pattern, check out my youtube tutorial below. Happy Weaving!